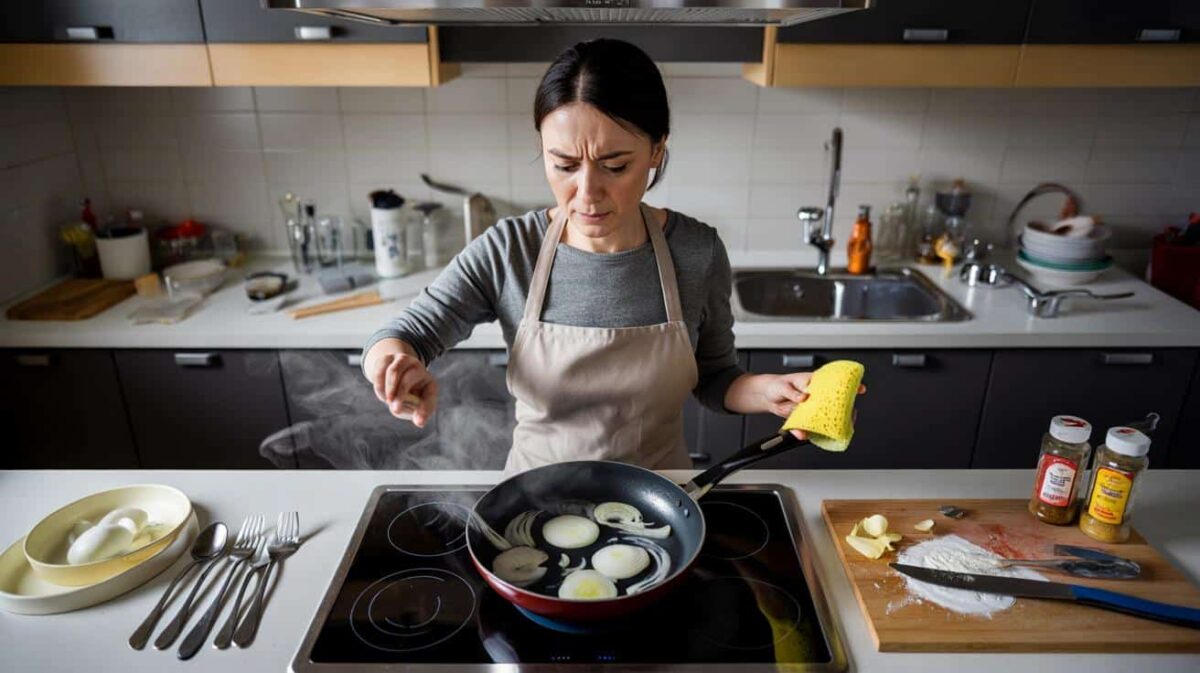
The evening you notice it is never special.
You slide the pan across the glass-ceramic cooktop like you’ve done a hundred times, wipe up a splash of sauce, and then your eye catches a thin, pale line. You bend closer. One scratch. Then another, in a messy arc under the biggest burner. Suddenly that glossy black surface that made the kitchen feel modern and clean looks tired, almost neglected. You run your nail over the line. It doesn’t snag, but it doesn’t disappear either.
You wonder if you’ve ruined it for good.
And then you learn that, most of the time, those scratches can be tamed in four surprisingly simple steps.
Why glass-ceramic cooktops scratch so easily (and why it’s not always permanent)
Glass-ceramic surfaces are a paradox. They look tough and sleek, yet the smallest grain of salt or sugar under a pan can trace a mark across them. The material is strong against heat, but the glossy top layer reacts to friction like a phone screen. One careless movement with a gritty pot bottom and there it is: a pale streak catching the light.
We tend to think of scratches as forever. On glass-ceramic, they’re sometimes just superficial scars in the top sheen.
Picture a Saturday morning. Someone slides a heavy cast-iron skillet across the cool hob to reach the sink. Breakfast is great, the kitchen smells like butter and coffee, and nobody notices the damage. Later that day, sunlight hits the cooktop just right, and suddenly it looks like a cat used it as a racetrack. Long, light scratches crisscross the main zone.
Panic hits first, then the online search spiral: toothpaste tricks, magic creams, bizarre home remedies. A few of them actually work on the shallow marks. Others are pure myth.
The truth is simple: most everyday scratches on glass-ceramic only affect the very top layer of shine. They’re visual more than structural. If your fingernail doesn’t catch strongly on the mark, odds are it’s a superficial scratch, or even burnt residue mimicking one. That’s where the four-step method comes in. Gently cutting back that top haze, filling hairline grooves, then polishing can visually erase or fade many of those lines. It’s less about miracle products, more about patient, controlled rubbing.
The four-step method to erase light scratches and bring back the gloss
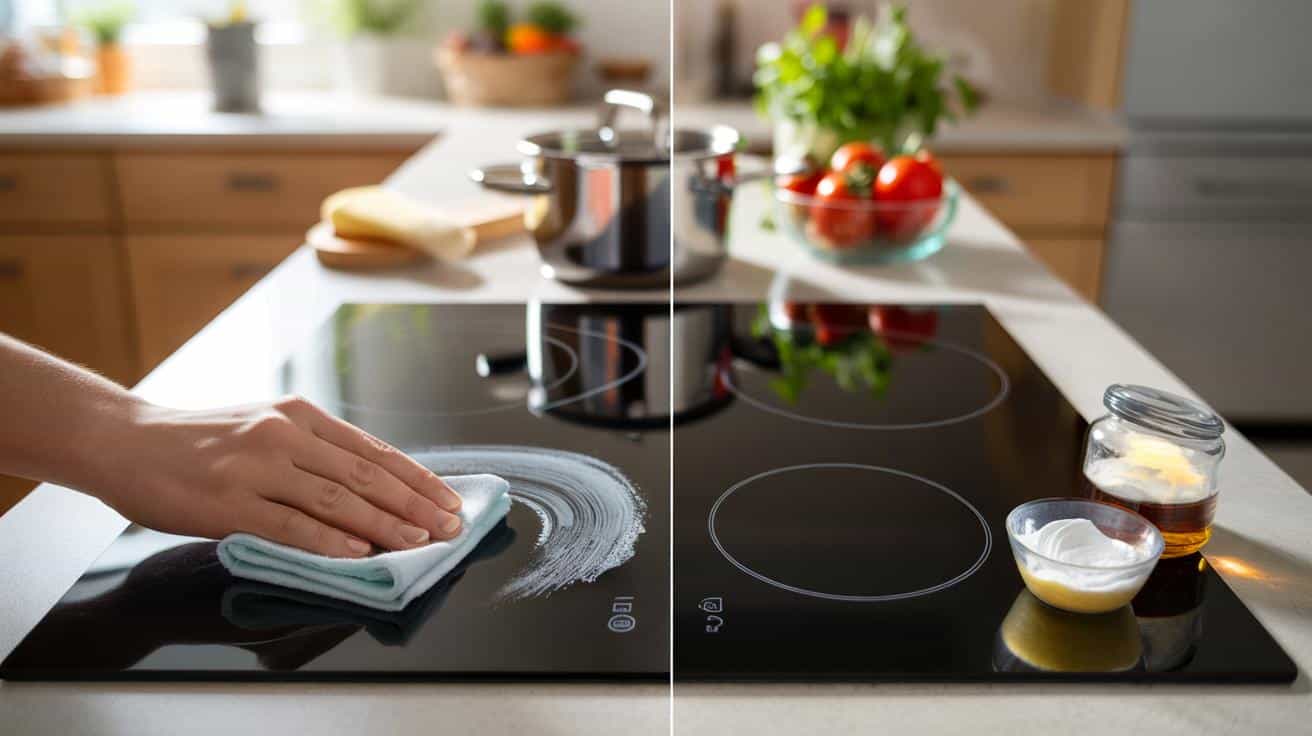
Step one is boring and essential: a deep, honest clean. Turn the cooktop completely cold. Wipe away crumbs, then use a dedicated glass-ceramic cleaner or a mix of a few drops of dish soap with warm water. Work with a soft sponge in small circles. Rinse with clean water and dry fully with a microfiber cloth.
This first step often reveals that some “scratches” were just burnt sugar, starch, or mineral streaks hardened on the surface.
➡️ Meteorologists warn early February Arctic breakdown may affect bird migration timing worldwide
➡️ I made this classic American pot roast and finally understood the hype
Step two is where the magic starts: a gentle abrasive. Many people use a specific glass-ceramic polishing cream, while others reach for white toothpaste or a paste of baking soda and water. The key is not the brand, it’s the softness. Apply a pea-sized amount on the scratch, then rub in tight circles using a cotton pad or microfiber cloth. Light pressure, steady rhythm, two to three minutes per area.
We’ve all been there, that moment when you realize you’re rubbing harder out of frustration. That’s the trap. Let the product and time do their work.
Step three is about inspection and repetition, not brute force. Wipe away the polish with a clean, damp cloth, then dry again. Tilt your head, move the light, look at the surface from different angles. If the scratch has faded but is still visible, repeat the polishing step one or two more times. Deep grooves that catch your nail won’t vanish completely, but they can blend into the reflection.
“People think they’ve ruined their hob forever,” says a professional appliance technician. “In reality, **most marks I’m called out for are shallow and respond well to gentle polishing**. The real damage comes from impatience and using the wrong tools.”
- Use only soft cloths or pads, never steel wool or gritty sponges.
- Polish in small circles, not long, aggressive strokes.
- Stop immediately if you see a rainbow-like dull patch forming.
- Finish with a final glass-ceramic cleaner for that uniform shine.
Living with a glass-ceramic cooktop without fearing every tiny scratch
Once you’ve nursed your cooktop back to a smoother, calmer surface, something changes in how you use the kitchen. You start lifting pans instead of dragging them. You shake off salt and sugar grains before you slide a pot. You keep one soft, slightly ridiculous “cooktop cloth” hanging nearby, ready for quick wipe-downs while dinner simmers.
Let’s be honest: nobody really does this every single day. Life gets busy, kids help cook, someone boils over pasta and runs out the door.
What shifts is not perfection, it’s awareness. You know those four steps are there, like a little repair ritual you can repeat when the glass starts to look tired again. You stop feeling that sick drop in your stomach with every new line and treat the surface more like a well-used countertop than a fragile museum piece.
*The goal isn’t a forever-flawless hob, it’s a clean, calm surface that doesn’t shout for attention every time the sun hits it.*
You might even share your method with friends who swear their cooktop is “ruined” after one dinner party. There’s a quiet satisfaction in showing someone how a few minutes of patient, circular polishing can soften a scratch they’d been staring at for months. Some marks stay as faint reminders, like tiny cooking souvenirs. Others vanish into the reflection, as if they never happened.
The glass doesn’t need to be perfect to feel good. It just needs to be smooth under your hand, dark and glossy enough that your kitchen feels cared for again.
| Key point | Detail | Value for the reader |
|---|---|---|
| Identify scratch depth | Use a fingernail test on the line | Quickly know if the four-step method can help |
| Use gentle abrasives only | Toothpaste, baking soda paste, or ceramic cream | Reduce risk of dull patches or new damage |
| Adopt small daily habits | Lift pans, wipe crumbs, soft cloth nearby | Fewer scratches over time and a longer-lasting cooktop |
FAQ:
- Can I remove deep scratches that catch my fingernail?Deep scratches usually can’t be completely removed at home, but gentle polishing often softens their appearance so they’re less visible in daily use.
- Is toothpaste really safe for glass-ceramic cooktops?Plain white, non-gel toothpaste with mild abrasives can work on light scratches if used sparingly with a soft cloth and wiped off thoroughly.
- What products should I avoid on a glass-ceramic surface?Avoid steel wool, scouring powders, gritty pads, knife blades, and oven sprays directly on the glass, as they can create permanent dull spots or deep grooves.
- How often can I polish my cooktop this way?For normal use, polishing problem spots once every few months is usually enough; constant heavy polishing can slowly reduce the shine.
- When should I call a professional or consider replacement?If cracks appear, the scratch is extremely deep and wide, or heating zones stop working properly, professional assessment or replacement is safer than DIY fixes.